Sanctuary Goes to Bimini, Bahamas!

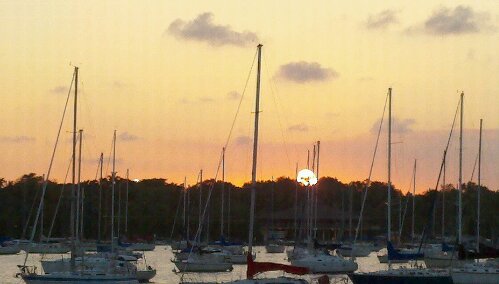
Our week in Bimini sadly came to an end, but what a joy it was. We towed Mermaid, Susan’s 15′ Whaler, over behind Sanctuary, and we are very happy we did that. We’ve had so much fun with that little boat. Before going over there, we had heard from a few that Bimini was a waste of time and that there was nothing to do or see here, and certainly not a place to spend even five days, much less a week. I found just the opposite. I guess it’s what you make of it and the company with whom you do it. There were six of us on the boat (Ed, Samantha, Martha, Susan, Brandon, and me). We were there for a week, and we could have spend another week because there is still more that we want to explore and see/do again. It was as if we only had time to sample things here in a week’s time rather than savor all of it.


We got there a day and a half late due to sea conditions in the Gulf Stream. Because we were towing a small boat over, we had to keep that in mind and wait for sea conditions that were conducive to that rather than just what the big boat could handle.


For me, the first full day here was a wind-down day with a lot of well deserved napping since I had had little sleep leading up to the trip, coupled with a lot of prep work, and I was exhausted once we got here. So, I welcomed a low-key day where I stayed on the boat most of the time. Most of the rest of the gang who had not been enduring the 3-hour-of-sleep-a-night went out exploring the little islands nearby and snorkeled wrecks.


We stayed at marina at Bimini Sands Resort on South Bimini. South Bimini is much more quiet and simple than is the busy North Bimini, by comparison. A lot of our fellow boaters have the misconceived notion that Bimini Sands is for small boats – that is simply not true. Heck, a large freighter delivered a load in here during the week, and there was an 80-footer, “Magnificent Dolls”, owned by our new friends, Bill and Lori, in the slip next to us which made Sanctuary look like a toy. By the way, I was delighted to find that the swimming pools at Bimini Sands were fresh water.


We met a lot of interesting people here during the week. We visited with Frank Cooney, the developer of this place for a while, and were impressed with his business philosophy and understand why Bimini Sands has been successful. We also met Steven, the owner of that freighter that came into Bimini Sands and spent an evening in their condo having cocktails. And the family on Magnificent Dolls was just awesome. Bill and Lori have four young children who will begin home schooling on that boat this fall since they are cruising for a while now. Even though they have a yacht that is of the category where you’d think they were “check writers” for everything; they are not. They get dirty in the engine room, and Lori doesn’t hesitate to help Bill carry an engine part through the boat. They run that boat themselves – very impressive. We want keep in touch with them as they travel and hopefully, we can meet up with them in the Exumas next summer.

On to the activities!!!! On Thursday, we set out looking for the infamous Bimini Road which is a formation of rocks underwater that appear to have been a road of some sort. When we thought we were over it, Martha was gearing up to go have a peek and see if we had found it. We were going to “troll” her over the area with a mask and snorkel to find the spot. Right at that time, Susan saw a giant shark and that ended all hopes of snorkeling that spot that day – nobody wanted to get in that water. Martha and Susan did continue to look for Bimini Road. We found it and marked it on the GPS. They would hang themselves over the edge of the Mermaid with only their faces in the water to see what was down there.

Later, we went to the Sapona, a shipwreck that stands up out of the water in about 15′ of water. We brought dive gear to dive it, but that wasn’t necessary. Everything there to see was close enough by snorkeling. It was too rough on the back side for me, so I didn’t get to see the stern and the propeller.


On Friday, we took Sanctuary down to Honeymoon Harbor with Mermaid in tow. Our neighbor in the slip next to us had been there on Thursday and reported hammerhead sharks in Honeymoon – something they had never seen there before. When we got there on Friday, we found nothing but friendly, playful stingrays looking for a handout. The beach quickly filled with boaters who obviously frequented the place often. It was no surprise that Susan became one of the highlights for some. The guy who all the others envied was the one who had a box of squid. He got to put the squid in the hip strings of Susan’s thong and the stingrays would come by and suck out the squid. It was quite a sight. That girl is so entertaining. We just love to take her places, turn her loose and watch other people. Susan is Sanctuary’s Mermaid.


On Friday night, the girls (Martha, Susan, and I) went over to North Bimini and took part in the junkanoo.


South Bimini has some of the most pristine beaches I’ve ever seen. I may revise that statement after we visit the Exumas at a later time. South Bimini, I think, is a hidden jewel in the Bimini islands. Everyone seems to gravitate to North Bimini, and I’m not sure why, having spent a week on South Bimini, and visiting North Bimini by dinghy or ferry whenever I wanted.


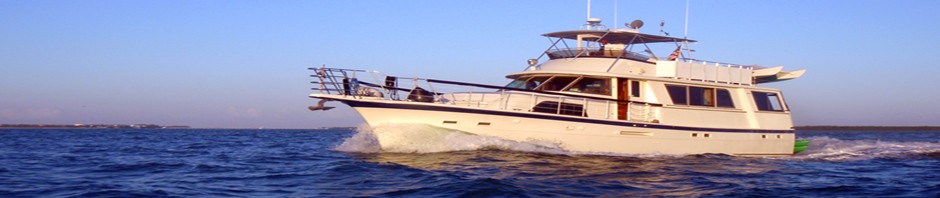
Sanctuary performed well and the only hiccup we had was a failed heat exchanger on the generator – not a show stopper, but I had my work cut out for me when we got back with replacing the heat exchanger and flushing the engine. I’m going to change all the hoses on the engine while I’ve got it all apart. Meanwhile, we just let seawater cool the engine…what choice did we have?

Cheers!

Ang


Posted in Adventures | Leave a comment

Goodbye carpet and worn out teak parquet floors….Hello African Mahogany!!!

Goodbye carpet and worn out teak parquet floors….Hello African Mahogany!!!

Companionway Between the Engine Rooms - Before

Companionway Between the Engine Rooms - After


Ever since Sanctuary arrived in my life, I have always wanted to put in wood floors. What I really wanted was teak and holly, but for a lot of reasons, I opted for a pre-finished laminate, instead. Having now experienced just how much work it is to install plank flooring and how much time it has taken, I am still happy with my decision.

Five years ago, we installed an off-white carpet throughout the boat just to get her ready for charter guests. The carpet that was on her when we got her looked like someone had rebuilt an engine on it. I knew the new carpet was going to be somewhat temporary, so I didn’t shop for quality – I didn’t even change out the pad beneath. I never expected the carpet to be on the boat for five years.

Over the years, we went to great lengths to take care of the off-white carpet, including initiating a rule of “no shoes” inside the boat. I became known as the No-Shoe Natzi, but for good reason. When the white carpet saw its last day on Sanctuary, it was worn, but still clean, without any dirt paths. The first step in the door in the pilothouse onto the wooden threshold where the shoes come off was filthy, and that wood will need to be refinished now. It was that very reason that we put the “no shoes” rule in place.

Back to the new floors….First, I’ll say that this job was way more intense than I expected, and I’m not afraid of hard work on a boat, but this one was a killer! Every day, I would just ache from head to toe, day after day.

I selected a 12 mm. thick flooring with an African Mahogany finish on it. To give you an idea of how thick this stuff is, the stuff at Lowes and Home Depot that they call their best quality is only about 8 mm. thick. This flooring is certainly proving to be quite durable in light of the things that have been dropped on it already.  The project flooring the entire boat took 28 boxes of flooring weighing 50 pounds each. It took me two trips in my car to get it all to the boat. Then I had the daunting task of hauling it down the long pier, up the steps and on to the marina. I lugged 1,400 pounds of flooring down the dock and up the stairs all by myself. Who needs a gym membership?

Prepping and Cleaning the Bare Floors

My first couple of days on the job consisted of pulling up the carpet, padding, tack strips, and about one million and one staples from the floors in the staterooms. The padding that was used previously was one of quality – a rippled rubber rather than a layer of glued foam pieces. The padding had been glued down to the subfloor when pulling up the padding, much of it stuck to the floor. I had to spend hours on my hands and knees scraping what was the consistency of chewing gum off the floor. Even my shoes would get stuck to the floor as I walked around on it. I also had to break out the grinder and remove spots where workers at the plant, when she was being built, had dropped a glob of thickened epoxy here and there. They used thickened epoxy to seal the crevices in the subfloor and to fill in any imperfections in the subfloor.

Lining the Floor with Plastic Sheeting

With carpet, you never knew where those globs were there. I could never get all the “sticky” gone, so I decided to line the floors with a layer of thick plastic sheeting. This gave me a clean, non-sticky surface upon which to work the planks. After all, this is a floating floor, so I didn’t want it glued down by virtue of the residual glue that was on the floor.

African Mahogany in Master Stateroom of our Hatteras Motoryacht

Master Stateroom in Progress

Now, it was time to start laying planks in the staterooms. There were many unique challenges along the way. The first one was deciding where to lay the first plank so that I didn’t end up with a sliver of flooring along one side of a room. The master stateroom, twin guest stateroom, and hallways are all connected in that part of the boat – it’s like trying to lay flooring in a pitch fork shape. I did my best to have it turn out as visually pleasing as possible and for the most part, it did.

Master Stateroom Entry

There was no way to make it perfect unless I broke up the flooring between the rooms, and I didn’t want to do that. With careful measuring and accurate math, I figured out how to cut and lay that first piece…the rest would flow from there…like a glacier flows, though! This took way longer than I thought it would.

In the staterooms, Hatteras did an incredible job of finish carpentry. There were no 90° corners anywhere. All of them were carved, smooth, carefully milled, rounded corners which are quite nice until you have to start cutting flooring to match each curve’s circumference.

Cutting Around Curves

I removed a piece of quarter round moulding from the galley and used that for a pattern; then, I transferred that pattern to a piece of cardboard which made it easier to transfer the curvature to the back of the plank so that it could be cut. This was tedious and time consuming for me, and when one didn’t fit quite right, I’d have to do it over again. The quarter round moulding that will be required to trim out the new floor will have to be carved out of a block of wood for those curves and then finished off with a router. Yes…I am going to have to fabricate my own quarter round for those corners.

Master Stateroom

Another challenge that really slowed down the job was that there were so many hatches in the floor. Just in the aft staterooms alone, there were 13 hatches. So, I’d get rolling with laying a couple of planks and then I’d have to stop and work around a hatch. Many people simply floor over those hatches that are rarely used, as was the case with whomever carpeted the boat before we got her.

More Hatches to Cut!

They covered up every hatch that accesses the bolts for the struts. Those bolts have bonding wires attached to them that need to be maintained. Also covered up were hatches that permitted access to things like the underside of the master shower drain which you need to access when replacing the drain (which I have done!).  I vowed never to cover up a hatch. Hatteras put them for good reason.


Salon Carpet Removal


Next, I moved to the upstairs. Removing the salon carpet was easy. To aid in handling, I cut the carpet into three strips so I could roll it up and carry it off the boat on my own.

Salon - prepping the floor


Old Teak Parquet Removal

Then came removal of the teak parquet flooring. I thought this would be easy since several of those little pieces would come up when vacuuming or would stick to your feet if they wet. I was always putting those things back in place like a puzzle. Well, apparently, those few pieces were the only ones that were loose.

Chiseling up Teak

While removing the teak parquet, I found five different kinds of adhesive. Some were easy to remove, but about half of them had to be chiseled up one sliver at a time, being careful not to pull up the subfloor with it. I swung that hammer countless times – each little piece of floor (the little individual rectangles) took about 4 to 5 hits of the hammer to knock loose. That part of the demolition was a beast of a job.

Almost Finished Chiseling up the Teak Parquet

When laying the salon floor, I realized for the first time that things I thought were straight and square, were not. When laying out the salon, I drew a perfectly straight line down the center of the boat. I worked outward from there. I knew the side walls were not straight, but the air conditioning cabinet, which I did think was straight, was far from it.

Nothing is Square

With lines in the planking on the floors, it was obvious what was straight and what wasn’t. With carpet, that cabinet in the corner looked square. In fact, when you a right angle on the outside corner, it is square, but it was built into a corner along two walls that are curved slightly. You don’t see it until you start putting lines, or stripes, up against it. Now, when I stare at that cabinet, I can see how it sits over there at an angle.

I toiled countless hours on my hands and knees putting the flooring down. It is amazing at just how long it takes when you’re working in a confined area that has a bunch of oddities to work around. Some days, I would look at what I accomplished from a square footage aspect and ask myself, “What did you do all day?” I just can’t explain it, but I would work on this from around 8:00 a.m. until 8:00 p.m. and only get a relatively small spot done considering I had worked on it for 12 hours.

Salon - Starboard Side Outer Wall

Well, it’s mostly done. I still need to trim out the hatches and install the quarter round trim. I also still need to do the stairs, but I need to measure and purchase the bullnose trim before I can get started on that.

I’m quite happy with the results. It feels good under foot, too. A benefit to not having carpet that I was hoping to achieve was a reduction in the dust. When I had carpet, I battled dust. In the morning sun shining through the window, I could see how thick it was in the air, and it was simply embarrassing, if not disgusting, to think we’re breathing all those little floating fibers. Carpet greatly contributes to that with all the fibers coming loose and dirt/dust getting trapped in the carpet. Now that the carpet is gone, I have noticed an incredible reduction in the particles that I can see floating in the air in the sunlight. I mean, a huge reduction!

I’m now down to working on the trim which, as I type this is laying on the aft deck with the first coat of finish on it. So far, I have measured up 203 feet of quarter round, and that doesn’t include the fourth stateroom or the crew stateroom, yet.

I’ve posted some photos. I don’t think the photos do justice. The flash tends to create a shine of the joints in the planks which are intentional grooves, and makes them look white-ish. It doesn’t look like that in person. The floor really does blend nicely. The camera’s flash also makes our teak walls look, well…not so good in some places, when in the natural light, it is quite a nice match. I think the floor is MUCH prettier to the natural eye than it is showing up in the photos. Remember, the photos don’t show any trim work installed, and the hatch cut-outs at that point were still rough.

Often, completion of one project evokes another. Stay tuned…

Posted in Projects | Leave a comment

Wish you were here!

image

Posted in Sunsets | Tagged | Leave a comment